In the ever-evolving landscape of website design and development, the WordPress Gutenberg editor has revolutionized the way we build and customize our content. Gone are the days of struggling with complex coding or relying on third-party plugins for every small change. With Gutenberg, the power to create dynamic and visually appealing websites is right at your fingertips.
One of the standout features of Gutenberg is the ability to create reusable blocks. These blocks act as building components that can be saved and used across multiple pages and posts, providing a consistent design and saving you valuable time and effort. Whether you’re a seasoned WordPress user or just getting started, understanding how to harness the full potential of reusable blocks can take your website customization to new heights.
In this blog post, we’ll delve into the world of reusable blocks in Gutenberg, exploring what they are, how to create them, and how to incorporate them seamlessly into your website. We’ll cover the step-by-step process of creating custom reusable blocks and share practical tips on optimizing their usage. Additionally, we’ll showcase real-life examples of how businesses and individuals are leveraging reusable blocks to enhance their online presence and streamline their workflows.
By the end of this article, you’ll have a comprehensive understanding of reusable blocks in Gutenberg and be equipped with the knowledge to create your own custom blocks to transform the way you build and maintain your WordPress websites. So let’s dive in and unlock the potential of reusable blocks in Gutenberg!
What are Reusable Blocks?
Reusable blocks in Gutenberg are pre-designed content components that can be saved, stored, and reused across multiple pages and posts within the WordPress editor. These blocks act as building blocks for your content, allowing you to create consistent and visually appealing layouts without the need to recreate them from scratch every time.
Think of reusable blocks as templates or mini-designs that encapsulate specific content elements such as call-to-action sections, testimonials, pricing tables, or any other component you frequently use on your website. Once you create a reusable block, you can easily insert it into any page or post, making it incredibly convenient for maintaining a consistent design and saving time.
Creating this type of block in Gutenberg is simple. You start by designing and customizing a block with the desired content, styling, and layout options. Once you’re satisfied with the block’s appearance, you can save it as a reusable block. This action generates a unique block that can be stored in your Gutenberg block library, ready for future use.
The beauty of this functionality lies in its flexibility. Any changes you make to a reusable block will automatically update across all instances where it is used, ensuring consistency throughout your website. Whether you want to update the text, change the styling, or add new functionality, modifying a reusable block will propagate the changes effortlessly across your entire website.
You can streamline your website’s design process, improve efficiency, and maintain a cohesive look and feel. They empower both developers and content creators to build websites with ease and flexibility, allowing for quicker iterations and a more user-friendly editing experience.
In the next sections, we’ll explore the step-by-step process of creating and using reusable blocks in Gutenberg, uncovering the possibilities they offer to enhance your WordPress websites.
Advantages of Reusable Blocks
Reusable blocks in Gutenberg offer several advantages that can significantly enhance your WordPress website development and content creation process. Here are some key advantages of using reusable blocks:
- Consistency: These blocks allow you to maintain a consistent design and layout across your website. By creating predefined blocks for headers, footers, sidebars, or any other frequently used components, you can ensure a cohesive visual identity and user experience throughout your site.
- Time and Effort Savings: With these types of blocks, you can save valuable time and effort. Instead of recreating the same content layout or design elements multiple times, you can simply insert the reusable block wherever needed. This streamlines the content creation process and enables you to focus on other important tasks.
- Easy Updates: Making updates and modifications becomes a breeze with these blocks. When you need to change the content, styling, or functionality of a block, you only need to update it once. The changes will automatically reflect across all instances of that block on your website, eliminating the need for manual updates.
- Flexibility and Customization: These blocks are highly flexible and customizable. You can create blocks for different purposes, such as testimonials, call-to-action sections, pricing tables, or complex layouts. These blocks can be modified and adjusted to suit specific pages or posts, providing you with the freedom to customize your website as desired.
- Improved Collaboration: These blocks facilitate collaboration among multiple users or teams working on the same website. By creating and sharing reusable blocks, everyone involved can use and maintain consistent design elements and content structures, fostering a cohesive and efficient workflow.
- Scaling and Reusability: As your website grows and evolves, reusable blocks become even more valuable. They enable you to scale your website without sacrificing consistency or spending excessive time on repetitive tasks. You can reuse blocks across different projects or even export and import them to other WordPress installations, saving you effort in recreating similar designs.
- Enhanced User Experience: Consistent and well-designed content layouts contribute to a better user experience. By utilizing reusable blocks, you can create visually appealing and user-friendly content structures that engage your visitors and convey information effectively.
Overall, reusable blocks in Gutenberg empower you to build and maintain websites more efficiently. They streamline the design process, save time, and provide the flexibility needed to adapt and grow your website with ease. By harnessing the power of reusable blocks, you can take your WordPress website development to the next level.
How to Create Reusable Block
Creating a reusable block in Gutenberg is a straightforward process. Follow these steps to create your own first reusable block:
- Open the Gutenberg Editor: Log in to your WordPress website, navigate to the post or page where you want to create the reusable block, and open the Gutenberg editor.
- Design and Customize the Block: Use the available Gutenberg blocks and tools to design and customize the content layout and styling of your reusable block. Add text, images, headings, buttons, or any other elements you want to include in the block. Use the block settings and toolbar to adjust the block’s appearance and functionality as needed.
- Group the Block (Optional): If your reusable block consists of multiple blocks or requires a specific structure, you can group them together. Select the blocks you want to group, click the “Block” icon in the toolbar, and choose the “Group” option. This step helps ensure the block’s integrity when used across different pages or posts.
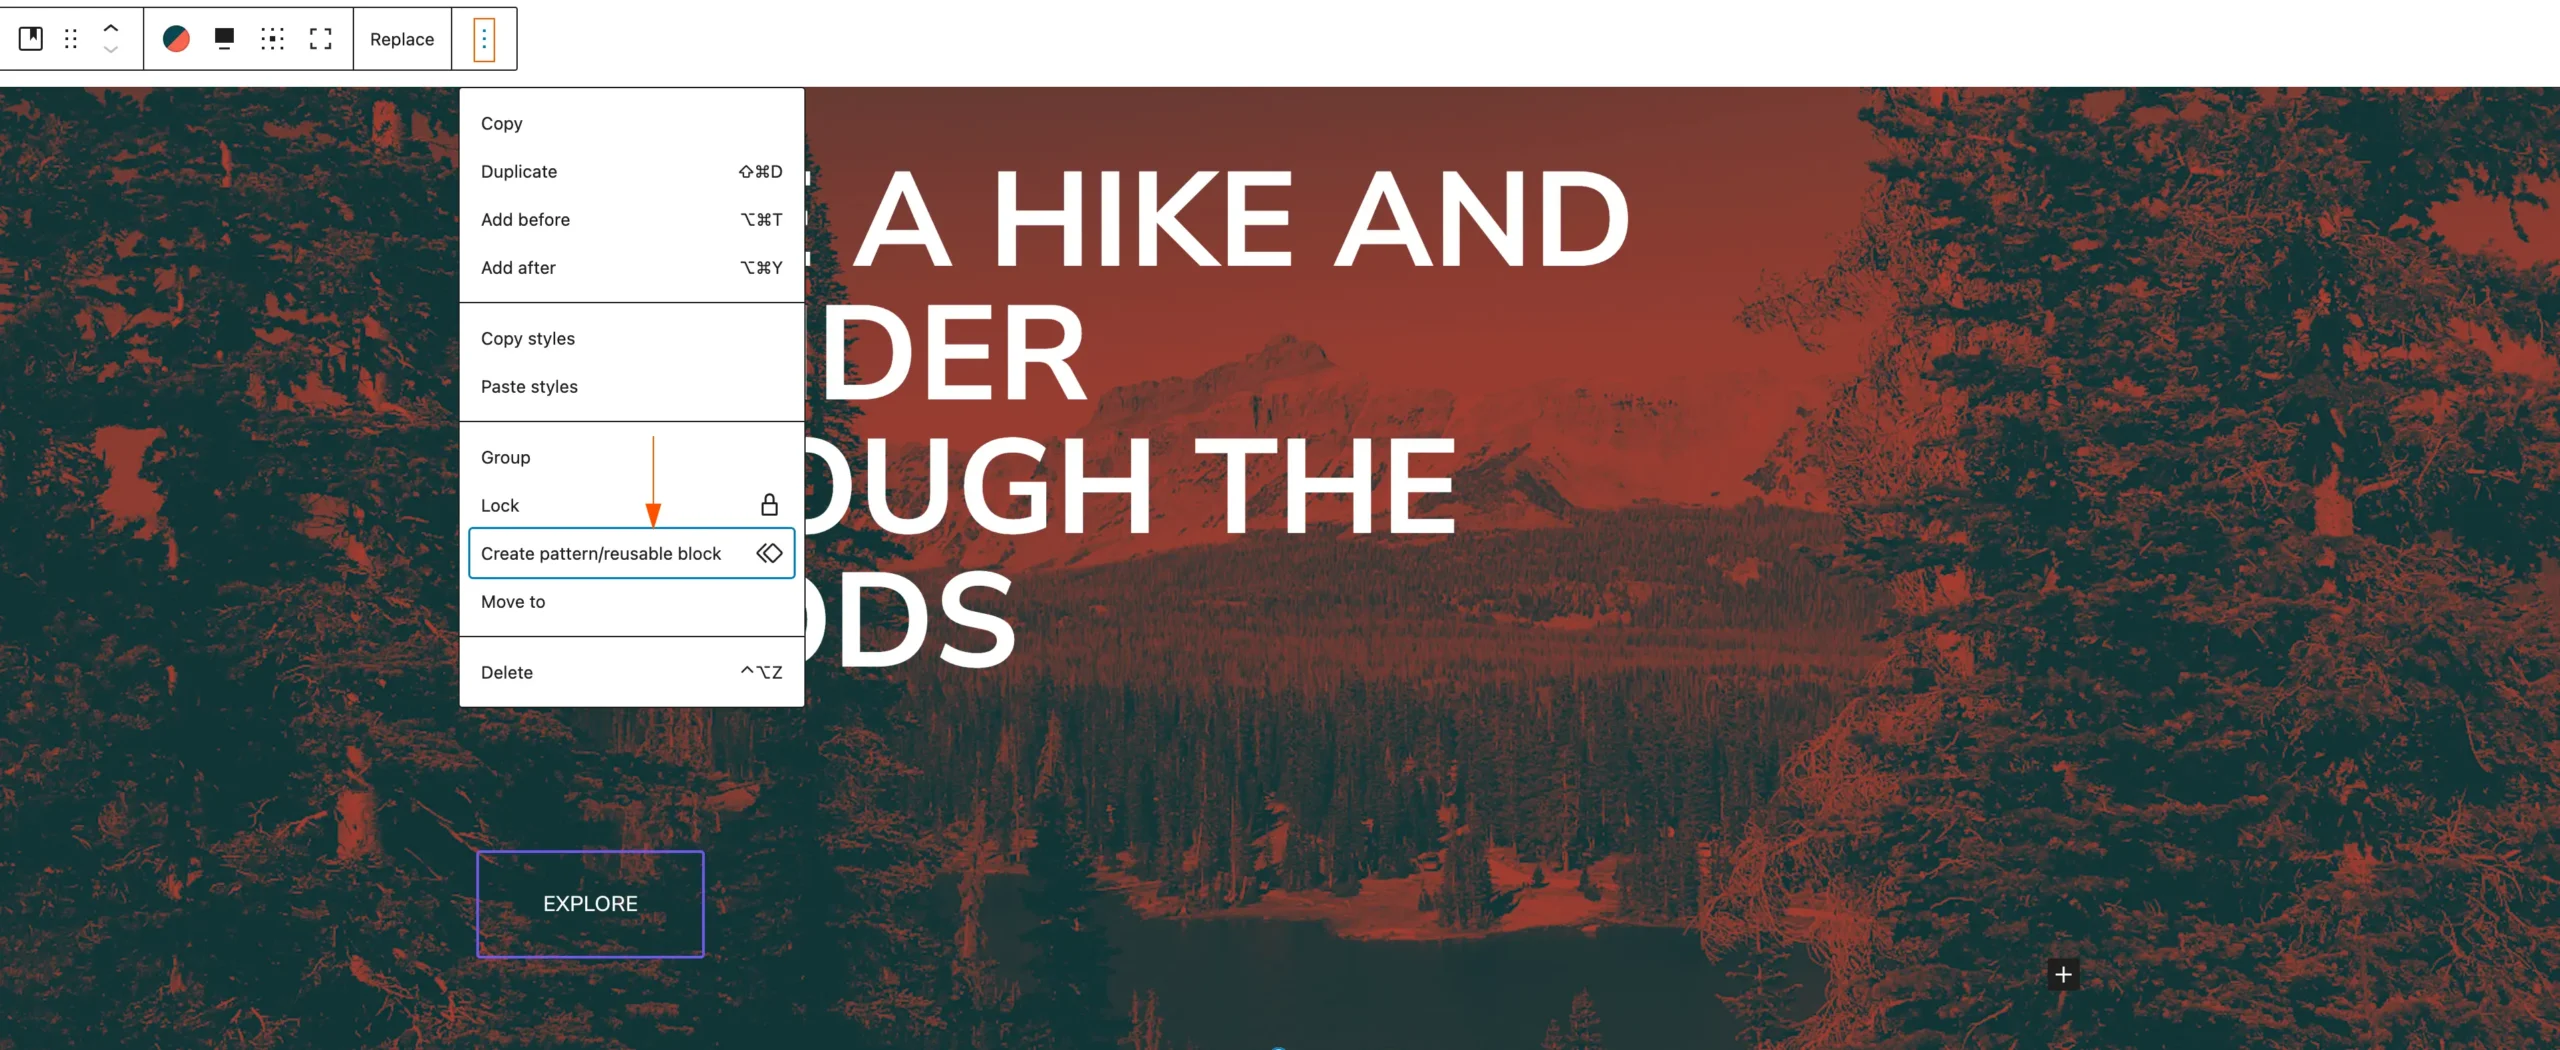
- Select and Save the Block: Once you’re satisfied with the design and customization of your block, select the entire block or group by clicking on it. In the Gutenberg toolbar, click the “Block” icon and choose the “Add to Reusable Blocks” option. A modal window will appear, prompting you to enter a name for your reusable block.
- Name the Reusable Block: Give your reusable block a descriptive and meaningful name that reflects its purpose or content. This name will help you easily identify and locate the block in the future when you want to use or modify it.
- Save the Reusable Block: Click the “Save” button in the modal window to save your reusable block. The block will now be added to the Gutenberg block library, making it accessible for future use.
Congratulations! You have successfully created a reusable block in Gutenberg. You can now insert this block into any page or post on your website by clicking the “+” icon in the Gutenberg editor, navigating to the “Reusable” tab, and selecting your saved block. Any updates or modifications made to the reusable block will automatically apply across all instances where it is used, providing consistency and saving you time in the long run.
Remember to regularly review and manage your reusable blocks to ensure they align with your website’s design guidelines and content needs.
Manage Reusable Blocks
Managing reusable blocks in Gutenberg involves organizing, modifying, and deleting blocks as needed. Here’s a step-by-step guide on how to effectively manage your reusable blocks:
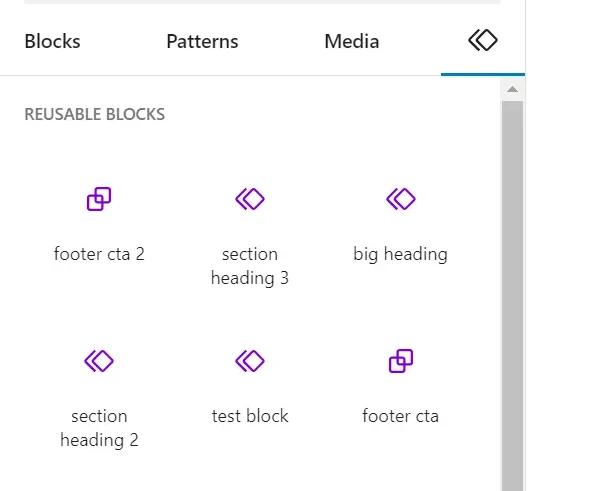
- Access the Block Library: Open the Gutenberg editor in WordPress by navigating to any post or page. Click on the “+” icon to add a new block. In the block selection panel, click on the “Reusable” tab to access the block library.
- Browse and Select Reusable Blocks: In the block library, you’ll find a list of all your saved reusable blocks. Browse through the blocks to find the one you want to manage. Click on the block to select it.
- Modify Reusable Blocks: To make changes to a reusable block, select it in the block library, and click the “Edit” button that appears. This will open the block in the Gutenberg editor, allowing you to modify its content, layout, styling, or any other aspect. Make the desired changes and click “Update” to save the modifications.
- Duplicate Reusable Blocks: If you want to create variations of an existing reusable block, you can duplicate it. Select the block in the block library, and click the “Duplicate” button. This action creates a new copy of the block, which you can then modify independently.
- Delete Reusable Blocks: To remove a reusable block from your library, select the block in the block library, and click the “Delete” button. A confirmation message will appear, asking you to confirm the deletion. Be cautious when deleting blocks, as it will permanently remove them from your library and any pages or posts where they are used.
- Organize Reusable Blocks: As your library grows, organizing your reusable blocks becomes essential. You can group related blocks together by creating folders or categories. To create a folder, click the “Add New Folder” button in the block library and provide a name for the folder. Then, drag and drop the blocks into the appropriate folders to keep them organized and easily accessible.
- Export and Import Reusable Blocks: If you want to transfer your reusable blocks to another WordPress installation or share them with others, you can export and import them. In the block library, select the blocks you want to export, click the “Export” button, and save the exported file. To import blocks, go to the block library on the target WordPress site, click the “Import from JSON” button, and select the exported file to import the blocks.
By effectively managing your reusable blocks, you can keep your block library organized, make necessary modifications, and optimize their usage across your website. Regularly review and update your reusable blocks to ensure they align with your evolving design and content needs, enabling a more efficient and streamlined WordPress editing experience.
Export a Reusable Block
To export a reusable block in Gutenberg, follow these steps:
- Access the Block Library: Open the Gutenberg editor in WordPress by navigating to any post or page. Click on the “+” icon to add a new block. In the block selection panel, click on the “Reusable” tab to access the block library.
- Select the Reusable Block: Browse through your reusable blocks and select the one you want to export. Click on the block to highlight it.
- Export the Reusable Block: With the reusable block selected, click on the three-dot menu icon (also known as the “More Options” icon) in the upper-right corner of the block. From the dropdown menu, choose the “Export as JSON” option.
- Save the Exported Block: After selecting “Export as JSON,” your browser will initiate the file download process. Choose a location on your computer where you want to save the exported block. Give it a descriptive name and add the “.json” extension to the file name. For example, “my-reusable-block.json”.
- Repeat for Additional Blocks (Optional): If you have multiple reusable blocks you want to export, repeat steps 2 to 4 for each block.
That’s it! You have successfully exported your reusable block(s) as JSON file(s). The exported JSON files can be used to import the blocks into other WordPress installations or shared with others who can import them into their Gutenberg block library.
Note: When importing the exported JSON file, make sure to follow the import process specific to the target WordPress installation or Gutenberg editor.
Import Reusable Blocks
To import reusable blocks in Gutenberg, follow these steps:
- Access the Block Library: Open the Gutenberg editor in WordPress by navigating to any post or page. Click on the “+” icon to add a new block. In the block selection panel, click on the “Reusable” tab to access the block library.
- Import the Reusable Block: In the block library, click on the “Import from JSON” button located at the top-right corner of the screen.
- Choose the JSON File: A file upload dialog box will appear. Click the “Choose File” button and browse your computer to select the JSON file containing the reusable block(s) you want to import. Once selected, click “Open” or “Choose” to confirm the file selection.
- Import the Block(s): After selecting the JSON file, click the “Import” button to start the import process. Gutenberg will process the file and import the reusable block(s) into your block library.
- Review and Use the Imported Blocks: Once the import is complete, you will see the imported reusable blocks listed in the block library. You can now use them by simply selecting the desired block and inserting it into your post or page by clicking on it.
That’s it! You have successfully imported the reusable block(s) into your Gutenberg block library. The imported blocks are now available for use on your WordPress website. Remember to review and organize your imported blocks as needed for easier access and management.
Note: Depending on the size and complexity of the imported blocks, the import process may take a few moments. Ensure that the JSON file you are importing is compatible with the version of Gutenberg and WordPress you are using.
How to use the Reusable Blocks
Using reusable blocks in Gutenberg is a straightforward process. Once you have created or imported reusable blocks into your Gutenberg block library, you can easily use them in your posts or pages. Here’s how to use reusable blocks:
- Open the Gutenberg Editor: Log in to your WordPress website and navigate to the post or page where you want to use the reusable block. Open the Gutenberg editor for that specific post or page.
- Access the Block Library: Click on the “+” icon to add a new block. In the block selection panel, click on the “Reusable” tab to access the block library.
- Browse and Select Reusable Blocks: In the block library, you’ll find a list of your saved reusable blocks. Browse through the blocks or use the search bar to locate the specific block you want to use. Click on the block to select it.
- Insert the Reusable Block: Once you have selected the reusable block, it will appear as a preview in the block library. Click on the block preview, and it will be inserted into your post or page at the current cursor position.
- Customize the Reusable Block: After inserting the reusable block, you can customize its content, styling, or any other aspects as needed. Select the block and use the Gutenberg editor’s tools and settings to make changes specific to that block instance.
- Update the Reusable Block (Optional): If you want to update the reusable block itself, rather than just its instance in the current post or page, you can do so by going back to the block library. Make the desired changes to the reusable block, save it, and all instances of that block across your website will be automatically updated.
- Repeat for Additional Blocks: If you need to use multiple reusable blocks in your post or page, repeat steps 3 to 6 to insert and customize each block accordingly.
By following these steps, you can effectively use reusable blocks to streamline your content creation process, ensure consistency across your website, and save time by reusing pre-designed and customizable blocks.
You can visit the official article to learn more about the Reusable Blocks topic.
Conclusion
In conclusion, reusable blocks in Gutenberg provide a powerful tool for WordPress website development and content creation. They offer numerous advantages, including consistency, time and effort savings, easy updates, flexibility and customization, improved collaboration, scaling and reusability, and enhanced user experience.
By creating reusable blocks, you can maintain a cohesive design throughout your website, save time by reusing content layouts, and easily make updates across multiple instances of the same block. The flexibility and customization options allow you to create blocks for various purposes and tailor them to specific pages or posts.
Furthermore, reusable blocks promote collaboration among multiple users or teams working on the same website, ensuring consistent design elements and content structures. As your website grows, reusable blocks facilitate scalability without sacrificing consistency or spending excessive time on repetitive tasks.
Ultimately, the use of reusable blocks in Gutenberg empowers you to elevate your WordPress website development process. By harnessing their potential, you can optimize your workflow, enhance user experience, and effectively manage and customize your website’s content.
So, go ahead and start creating your reusable blocks in Gutenberg to unlock a more efficient and streamlined content creation experience, allowing you to focus on what matters most: delivering engaging and visually appealing content to your audience.